
I don't know about you guys, but this past weekend seemed to last FOREVER..
I hope you all had an awesome Labor Day weekend!
During this LONG weekend I created a couple little rings for MYSELF :)
I just couldn't help it, I thought these were so cute I had to make a few for me!!
 I think it's very Cute! The possibilities for these are endless! You could add them to a headband, make a necklace and pin... Just think!
Now... Would you like to know how to make these??
Well, here's your chance!
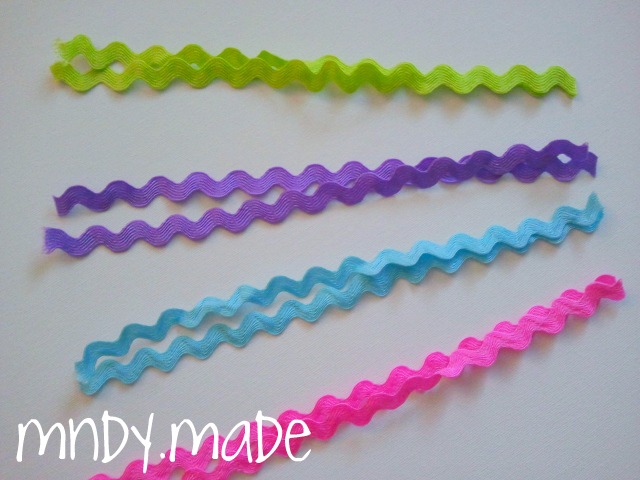
What you will need:
2-10" strips of Ric Rac: (I tried with different sizes of it and the medium size seemed to work the best)
Matching thread
Hot Glue
Blank Ring
Scissors


During this LONG weekend I created a couple little rings for MYSELF :)
I just couldn't help it, I thought these were so cute I had to make a few for me!!

Now... Would you like to know how to make these??
Well, here's your chance!
What you will need:
2-10" strips of Ric Rac: (I tried with different sizes of it and the medium size seemed to work the best)
Matching thread
Hot Glue
Blank Ring
Scissors

Cut the ric rac into 2 10" strips
Twist the ric rac together like so (I used a hair clip to hold one end together for me)

Now sew the bottom half of the ric rac together (I would normally use coordinating thread, but for this tutorial I used darker so you would be able to see it)

Take it and start rolling it together, I used a little dot of hot glue every now and then to make sure it would stay together

When you come to the end tuck it under and hot glue it!
When you are finished rolling it, you will have this

Now if you like it like this you can leave it, but I wanted my flower to bloom.
I started with the ends and pushed the petals down so that the flower looked like it had bloomed

I glued a little circle of felt to the bottom of it and then glued it on the pad of the ring, you don't have to glue the felt on, I just like to for looks.
And now you have your Rose Ring!

Have fun creating with these!
I'll see you guys tomorrow!
*I will have these available in my store this weekend!*
Wow! These flowers are so cute and I love the ring! I think I'll have to make one to go with some of my new Fall clothes. :) Thanks for sharing!
ReplyDeleteI'm your newest follower and would love for you to come link this up at So Sweet Sundays!
morrowsunshine.blogspot.com
Que bonito!Tengo que hacerlo,ya.Gracias.Bsos.
ReplyDeleteThat looks so adorable! Wouldn't have realised it was made from ric rac.
ReplyDeleteCute!
ReplyDeleteThis is so cute! Great tutorial! I have a link party that starts every Wednesday and I'd love to have you join!
ReplyDeleteMarie
mylilpinkpocket.blogspot.com
Gorgeous! I would love it if you would stop by and share at the crafty link party going on right now at Lines Across My Face.
ReplyDeleteI hope to see you soon,
Rachel
http://linesacrossmyface.blogspot.com/2011/09/cure-for-common-monday-8-flashback.html
I have made rosette necklaces with the ric rac before but my roses didn't turn out this pretty. I am following you with GFC now :)
ReplyDeleteSaw you at MMM linky. Would love for you to join my any linky goes party that runs Fri-Monday.
Here is what I shared at MMM Linky.
http://bacontimewiththehungryhypo.blogspot.com/2011/09/halloween-diy-trash-2-treasure-bear.html
That is adorable! Thanks so much for the tute. I must buy the stuff to do one soon. :)
ReplyDeleteThis is such a cute ring! Thanks for the tutorial :) Visiting from I heart naptime.
ReplyDeleteWould love for you to link your rings up to DIY Diva Thursdays this week :)
Kara
www.mineforthemaking.com
Hi there- found you through the hop and am a new follower. These rings are adorable. Let look "hard" but made out or ric rac, would be so soft. I like it! I hope you have time to follow my life in South Africa by http://withoutcomplexities.blogspot.com
ReplyDeleteI hope you are having a great week!
This is awesome! I must make this for sure! Thank you for linking this up at Show & Share!
ReplyDeleteThis is a super cute ring and a great idea for kids or adults. :) Thanks for sharing! I would love for you to link this up at Freshmen Friday at http://www.homesavvyatoz.com/tips-for-building-your-blog-or-website-freshmen-friday-2/
ReplyDeleteYou are being featured this week at Lines Across My Face. Thanks for sharing and I hope to see you again.
ReplyDeleteRachel
http://linesacrossmyface.blogspot.com/2011/09/cure-for-common-monday-9.html
Thanks so much! :)
ReplyDeleteJust wanted to let you know that I featured you today @ Southern Lovely. Grab a button, if you'd like.
ReplyDeletehttp://southernlovely.blogspot.com/2011/09/show-share-5-features.html
Awesome...!!!
ReplyDeleteWhat a creativity... I love your post very much.. Thanks for sharing with us.. I would like to see more updates from your side...
buy kamagra online
Great tutorial! I am going to feature and link to it in a future post so others can come visit.
ReplyDeletewww.beadinggem.com
Hello! I linked one of your projects to my blog. If it’s not ok with you, let me know and I will remove links and pics asap.
ReplyDeletehttp://cecrisicecrisi.blogspot.it/2012/06/13-tutorial-fai-da-te-per-realizzare-un.html
Take care, alex
wow so cute!! great idea for rick-rack :D
ReplyDeleteI also love this wire rose ring https://www.etsy.com/listing/102511778/eggplant-purple-rose-ring-wire-wrapped
Very cute and easy...I will make with my girls for their friends :) Thank you so much!!!
ReplyDeleteThis comment has been removed by the author.
ReplyDeleteA rose bear is a unique and thoughtful gift for someone special in your life. This cuddly teddy comes with a red rose tucked inside its back, making it the perfect way to show your loved one how much you care. Rose bears are also a great way to say "I'm sorry" or "Happy Valentine's Day.
ReplyDelete